Table of Contents
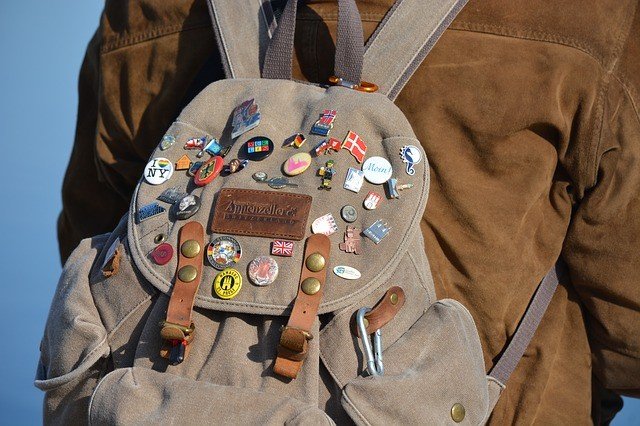
Iron-on Patches are a great way to express your individuality and showcase your artistic skills. No doubt, it seems easy placing your iron patch on your backpack. Well, it takes more than this to create the desired effect. In this post, I show you how to Iron on a Patch to a Backpack. With it, you make the best backpacks for men or the best laptop backpack for women even better.
9 steps to Iron on a Patch to a Backpack
Surely, you may say, “ironing on a patch to a backpack is no rocket science”.
Well, it takes skill and strict adherence to the “how’s” to the beautiful backpack design you’re gunning for. Irrespective of the type of iron-on label – embroidered or flat, these steps and how-to’s make all the difference between a cringe-worthy shoddy work and a beautiful art design.
So, get ready to explore these steps in detail:
- First, Understand the Fabrics!
- Plan the Arrangement of the Iron-on Label
- Set the Right Temperature
- Place a Towel Over the Area
- Iron the Area
- Check the Patch
- Iron the Other Side
- Allow it to Cool
- So, how can you retain the iron-on patch?
1. First, Understand the Fabrics!
Before you iron on that patch, understand the fabric of both the patch and the backpack. For example, denim or cotton backpacks are usually the most ideal base for these patches on labels, thanks to their easy.
On the other hand, leather backpacks are often tricky and difficult to use as a base for these patches. Backpacks made with sensitive materials such as silk and polyester are not ideal for a patch-on label. It’s easy to discolor or burn such materials during this operation.
More so, not all patches come with an adhesive on the back. Some patches only have a cloth backing, and you may have to find an adhesive to make it stick to the cloth during ironing.Lastly, check the tag on the backpack to make sure you can even iron on it.
Ready for the next step? At this point, your backpack is already on the iron board. Now, let’s move to the next step.
2. Plan the Arrangement of the Iron-on Label
No doubt, this is applicable only when you’re working with more than one label. Mind you, even when working with one label, you need to place it in a tasteful position. Also, remember to place labels such as letters and asymmetric symbols in the right order.
3. Set the Right Temperature
Here’s the tricky part: you have to set the iron at the right temperature to ensure a smooth operation. Once again, understand the fabric you’re working with. If you’re unsure of the right temperature to use for the iron-on the label, it’s advisable to try a temperature between 280 – 305 F.
4. Place a Towel Over the Area
This is the point where you’re wondering why you have to go through some trouble. Well, this step is necessary if you don’t want to end with a wrinkled patch-on label. More so, it’s important if your backpack is made up of heat-sensitive materials like polyester and linen. Take care not to disturb the placement of the patch.
Before you start ironing, make sure the backpack is on a smooth dry surface. Not doing this will affect the placement and smoothness of the iron on the label.
5. Iron the Area
Place your iron gently on the towel covering the area. Hold it down for 15 to 20 seconds. Move the iron in a circular motion to evenly distribute the heat across all areas of the patch. Take your time and iron with a steady head. Iron for longer seconds when dealing with embroidered labels, and shorter seconds for light, thin cloth labels.
6. Check the Patch
It’s time for the reveal! Remove the towel and examine the work done. Mind you, it’s probably hot after ironing. The patch should stick to the backpack fabric without any wrinkles or sides turning up.
If not, place the towel or cloth over it and repeat the procedure. This time, however, repeat the process for upwards of 30 seconds. What’s more? This time, don’t use a circular motion.Wait a minute! Your job isn’t done yet!
7. Iron the Other Side
Congrats on securely placing the label on the backpack. Now, it’s time to Iron the other side. This is a tad inconvenient since you’re dealing with a backpack. So, take care not to wrinkle the newly attached label during this step. Place the towel on the back of the backpack where the label is attached to, and iron again.
This step is crucial to the success of your patch-on operation. By ironing the other side, you’re melting the adhesive again and ensuring that it sticks fully into the fabric. 10 – 15 seconds is enough for this step.
8. Allow it to Cool
Now, sit back and relax after securing the label to your backpack. No doubt, 60 seconds of cooling will do the trick. This is also the time when you have to permanently secure the label to the backpack.
Why?
The adhesive on the back of the patch isn’t enough to withstand continuous hand washing or the motion of washing machines. So, consider sewing around the patch to secure it permanently to the fabric. This will reduce the chances of it falling off. Select a thread that matches the color of the patch, and sew away!
Hold on, there’s a crux: don’t attempt to sew around the edges of paper patches.
9. So, how can you retain the iron-on patch?
First, don’t wash more than you need to. Even when you handwash the backpack, ensure you do it in a cold to lukewarm water. Using hot water will soften the adhesive and may cause the patch to fall off.
Alternatively, only use the gentle cycle setting when using a washing machine. In addition to this, trim off the edges of the patch if it starts to fray.
Wrapping Up
Getting your favorite iron-on patch on your backpack is absolutely worth the experience. So, take charge of these steps and get the best possible results.
If you have any questions “How to Iron on a Patch to a Backpack” please write a comment.
Recommended Reading
Everything You Need to Know About When the Backpack Was Invented
Here you will find the answer to the question "When was the backpack invented?" and lots more interesting information about this question.
How to Choose the Best Hydration Pack for Running Half Marathon
How Big Is a 30 Liter Backpack: A Complete Guide
Planning for a hiking but confused about how big is a 30 liter backpack? Don't worry; here is a detailed guide!
2 Easy Ways to Make a Stylish Backpack Out of Old Jeans
Throwing denims might not be the best idea when there is an innovative way to recycle them. Want to learn how to make a backpack out of jeans? Let's do this
What is a Backpack Rapper?
So, what or who is a backpack rapper? No doubt, this is one BIG question that's generated a lot of conflicting views in the backpacking niche.
When Did Backpacks Become Popular: A Trip Down Memory Lane
People didn't always have backpacks. So, when exactly did backpacks become popular? We've detailed a timeline of inventions and designs over the years.